Pages

Friday, 9 December 2016

embroidered brooches


Embroidering a little ATC has left me feeling all inspired to keep embroidering on a tiny scale.

I really like working with small designs but the question of what to do with them once they're made has stopped me from making more. Until now that is.
I've started making little brooches. I've made one already and that turned out pretty well (I thought so anyway 😊), so now I'm making more.


I'm sticking with fairly simple designs for now. Summery flowers and bees to stave off winter blues and one with birds and snow which is both wintry and blue! 

Embroidery is very calming. I've really enjoyed making these tiny stitches. Just focusing on each stitch as it's made. It's quite therapeutic. 

The snow flakes are such tiny details it is really tricky to photograph them.

These little brooches also have the added benefit of being relatively quick to make, compared to a larger piece. Which means WIPs quickly become finished objects. Woohoo for the satisfaction of finishing! Finishing a project and looking at the result is my favourite part of making; apart from giving it to someone and knowing that they like it too, which is also very satisfying.

Here's how they will look when they are finished


One down, two to go...

My fingers are already itching to make more.

                                                             *B*

I'm linking up with Thistlebears winter projects

PS. Anyone else have trouble taking good photos in the winter? These photos took forever to get 😒😉

Saturday, 3 December 2016

Winter Sparkles ATC Swap Finish

There was a beautiful blue sky and a lovely bright autumn day outside my window today. Even with the chilly temperatures a bright day can warm the heart. It's so nice.

As I mentioned in my last post, I have joined in with a textile ATC swap. This is the forth time I've joined in the swap and I must say I really love it. Working on a tiny little artwork as a gift for a swap partner is extremely rewarding; and the excitement of waiting for the ATC you will receive is really fun.

I have a 'Ta-Da' prepared and a little showcase of the ATC's I've made so far and the ATC's I've received in the swaps.

I also have some fun news for you. I've written a guest post over at VeryBerryHandmade. Ali at veryberry very kindly let me take over her blog and write a post about design process. I have shared my top three tips on designing an ATC. In the post I talk specifically about designing ATC's, but the principles of the design process can be used when designing and planning any project. I'd love for you to read it and see if you find the tips useful.

An ATC is a little artwork meant to showcase an artists skill and style and is used like a business card. They are 2.5" x 3.5" so they really are tiny. The swap Ali runs is for textile ATC's so it's an opportunity to make a little piece of art with a needle. The size is a fun challenge and allows you to experiment and try a new technique without having to commit to a large project.

So let me show you my ATC

The first thing my husband said when he saw this was 'You should try making it straight next time'. *sigh*. Don't look closely, my ATC's are all wonky!

The theme this time round was 'winter sparkles'. I haven't got anything sparkly to stitch with so I had to think outside the box. My hope was to use teeny tiny pearls to represent snow falling between embroidered stars. What do you think? Can you see where I was going? 
I hope my swap partner likes it.
The hills and fields are made with wool felt, which is a new-to-me material I'm exploring. It gets quite thick in those layers so I cut it to the seam line underneath to reduce the bulk. Even so, it has a satisfying squishiness to it. I'm really falling in love with this wool felt. It feels sturdy and holds it's shape well but isn't as stiff as I thought it would be. It would be perfect for some soft sculptures.

These are the ATC's I've made for past swaps

Theme- 'My Favourite'. A meadow landscape
                                 
Theme- 'Winter Comforts'

Theme- 'Say Something'. This is from a poem


And these are the ATC's I've received


You can see the care and work that has been put into making these little pieces of art. I love them. The top one was made by Ann and the bottom one by Catherine.

Fran, my partner for one of the swaps struggled to make an ATC in time for the posting date so she sent me a mug rug instead. I absolutely love it. It lives on my desk, often with a little tea pot and cup sitting on it.


Now, I need some advice. While I was making my pearly, snowy landscape, I had another design in my head that wouldn't sit still until I made it. I had to leave my landscape half made and go and stitch the other design so I could get it out of my head. Does that ever happen to you?
Anyway, I started the other ATC idea. A spiderweb. I painted a background. I used some satin embroidery thread to stitch the pattern and used tiny beads to represent frozen dew. I love spiderwebs at this time of year. I need to clarify - I hate spiders and I don't like webs indoors at any time of year because of, well, spiders. But I love to see dew hanging like diamonds from the threads that are outdoors and webs are so beautiful when they are frozen.

Here it is with a card 'window' placed over it. I apologise for the shadows and the wonkiness

I'm pretty happy with the glass beads. They look like dew to me. It's missing something though. I thought of using some white thread to embroider along the web to look like frost. My mother-in-law suggested I embroider a spider, but as has been said, spiders are a big no-no for me. bleh. I even countered her suggestion with an idea of an unfortunate fly wrapped in web. She thought that was gross. So I don't know. It needs something more. Any suggestions?

                                                                              *B*


Linking up to  Link Your stuff

Saturday, 12 November 2016

Winter Projects

Hi there!

I have some WIPs to show you today. Jennifer over at Thistlebear is throwing a link party every month this winter for peeps to show off what they are working on and to encourage and motivate each other to finish their projects. What a great idea! I'm joining in this month. I encourage you to go and check it out if you haven't already. There are some very lovely and inspirational projects being shared over there.

On to my WIPs


I'm taking part in an ATC swap over at Very Berry Handmade. For those that haven't heard of an ATC before, it stands for artist trading card and is a small piece of art, about the size of a business card, that is given away as a mini showcase of an artists work. Ali of very berry handmade organises a swap twice a year for textile ATC's. It's a lot of fun. I'll have more to share on that soon.
I've designed my ATC already but have only got as far as pulling the fabric and gathering the supplies I want to use. I'm going to try something a bit different this time. I'm going to have a go at layering with felt to embroider a landscape and -this is the biggest leap for me- use beads amongst the embroidery. I know that a lot of you would have done this a hundred times but using beads in an embroidery project is totally new to me. We'll see how it goes...


I'm also playing with ideas for new things to add to my shop (link in side bar). Firstly, I'm designing some arm warmers in a 4ply yarn that will give an extra layer under a winter coat but that will look nice to wear indoors too. This will be a long term project. Secondly, I've got some super chunky wool that is a pleasure to crochet with. It works up so quickly and the chunkiness is satisfyingly thick and bulky. I'm working on making some chunky necklaces. I like to have something warm to wear around my neck indoors but don't want to wear a scarf all day and I thought there are probably people out there who feel the same so I'm making one or two for my shop. Hopefully these will look chic enough for the office and will still keep the chill off. We'll see how that goes too... :)


Just for fun, I'm making a rhino softie. I really enjoy sewing sofies and soft sculptures and when I saw this online I had to make one. Unfortunately the pattern doesn't seem to be available anymore, in that the blog I found it on seems to have gone offline so I can't share it. This is going to be another long term project that I will work on bit by bit. So far, I've cut most of the pieces out, now I need to start sewing it up.

They're my winter projects. I have enough here to last me until spring. :) What are you working on this winter? Are you making something cosy to snuggle in when the nights draw in? Or are you a late night crafter with a sewing project you can rest on your lap while you work and watch telly at the same time?

                                                               *B*


Linking up with Winter Project link party at Thistlebear

Saturday, 5 November 2016

Cherry Berry and Chocolate Cookies


I love baking. Sweet things are my favourite of course, but I like to bake savoury too. My favourite part of baking is seeing my family and friends enjoy the things I've made. In my past life as a healthy person I would bake bread at least once a week, and sweet treats 2 or 3 times a week and I would make ice cream all summer. Technically making ice cream isn't baking... in fact freezing something is the complete opposite of 'baking', isn't it? Oh well, you get what I mean.

Nowadays I can't bake as it's just too painful and tiring, but every now and then my husband has some free time and that free time coincides with me having an 'I wish I could bake...' thought at the same time as me having the strength to sit on a dining chair. It's a perfect storm but when that happens, *sometimes* he allows me to live vicariously through him. I tell him what to do and what ingredients and measurements to use and he makes and bakes. This has many benefits: we get to spend some time together, I get the satisfaction of seeing something baked and he gets the pleasure of eating baked goods. Of course it isn't the same as baking myself and I do miss being able to measure and mix everything but it's a close second.

Last week we had the 'perfect storm'. He took some time off work and I had some dried cherry berry mix in the kitchen and a hankering to make cookies. Here's the recipe:


100g Butter
50g Soft Brown Sugar
1/2tsp Vanilla essence
about 1/2 cup or a small handful of Dried Fruit (I used cherry berry fruit mix)
1tbsp Golden Syrup
100g Plain Flour
1/4tsp Bicarbonate of soda
Chocolate to decorate


Cream the butter and sugar together until pale and light. 
Add vanilla essence and syrup and mix in with the dried fruit. Then sift the flour and bicarbonate of soda into the mixture and stir to combine.
Next, lightly grease a baking tray and using two teaspoons, spoon the mixture into little mounds on the tray, spaced well apart. We got 16 cookies from this mixture. 
Bake at 180*C/350*F in a fan oven or gas mark 4 for about 10 minutes but check after 8. 
When the cookies are cool melt the chocolate (I used white chocolate) and use to decorate the biscuits. 
Dipping the bottoms into the chocolate and leaving to set on some baking paper creates a nice effect, but for my cookies, I drizzled some chocolate in a zigzag pattern on the tops.

I hope you make some of these delicious cookies yourself. They're quite easy and totally scrummy.

                                                                          *B*


Linking up with Link Your Stuff

Tuesday, 25 October 2016

Alpaca Victoria Shawl


One of the blogs I follow is Cherry Heart written by the lovely Sandra Paul. Sandra makes the prettiest things, whether it's knitting, crochet or sewing. I love her style. Her projects and her blog have an easy going, effortlessly pretty feel to them which makes reading her blog like a breath of fresh air. In fact cherry heart is one of the blogs that inspired me to start my own blog.

That being said, it's no surprise that when Sandra released a pattern for a crochet shawl earlier this year I couldn't wait to get my hands on it. The Victoria shawl is a good sized shawl pattern that is plenty big enough to cover your shoulders and arms.


The pattern made by the cluster stitches in the main body of the shawl is beautifully delicate and after you've completed a few repeats is easy to remember. The finishing touch is the border design which is just soo pretty. It really adds a feminine flare and frames the shawl beautifully.


Sandra recommends using a luxury yarn for this shawl and I have to completely agree. I used 100% alpaca which is buttery soft and has a wonderful drape. I think it was the perfect yarn for this pattern, not just for its softness but also because alpaca is such a warm fibre which is pretty ideal for a shawl.

Here are some modelled photos. Embarrassing, but I always appreciate bloggers modelling their makes. Mustn't be a hypocrite.


I was deliciously cosy during this photo shoot.

A bit of a cliche shawl pose, but the best way to show the full size of the shawl


Victoria pattern pros:
                                   Easy to follow instructions, well written. A crochet chart is included, which I actually didn't use this time as the written instructions were so clear but are very useful for understanding a pattern at a glance.

Cons:
          Not really a con but this pattern is marked as an intermediate level pattern which I agree with, so not for a beginner. Like I said, not really a con as those who are more experienced at crochet would enjoy making this shawl because of the intermediate level of difficulty.


Crochet is such a relaxing craft. Especially when crocheting a repetitive pattern as in a shawl. It can be quite therapeutic. If it's a craft that you've thought you might like to learn then I encourage you to get some wool and a hook and give it a go. There are plenty of places online where you can learn to crochet. In fact Sandra has some good tutorials on cherryheart for stitches and patterns here that I've found enormously useful when learning to crochet.

                                                                         *B*


Linking up with Link Your Stuff

Friday, 7 October 2016

Seaside Finds On Folksy Friday

I've just spent a lovely week by the sea in Whitby. Is there anything nicer than drinking in the sea air and squidging your toes into the wet sand while watching ships pass and seals play? We spent the week mostly eating chips, cake and ice cream. Not very healthy, I grant you, but completely brilliant. It was a very welcome break, even if the sea breeze did turn my hair into a puff ball for the week.

I am in total envy of those of you who live near the sea and get to enjoy these things as often as you like.

Now that we're back home I'm feeling decidedly land-locked. I even suggested to my husband that we re-decorate the living room with a sea side theme. He laughed. Maybe he thought I was joking; and maybe he'll have a lovely surprise one day when he comes back from work...

I've already been looking at sea side themed items on Folksy. If you haven't heard of Folksy before, it is an online market for British artists, designers and makers. I can thoroughly recommend a peruse of the wonderful items on offer over there, though be prepared to get lost in the awesomeness.

Here are some sea side-y items I've found

First up is jewellery from Angela at Seashore Treasures. Can you believe the glass ring in this necklace is actually a bottle neck that was found on the beach? Angela has a shop full of beautiful things made from glass and china that she finds on the beach.


I love this headband by Rachel of  Ratzhatz. I love the sea turquoise colour and those beads set it off beautifully. Also, it looks so snug which is great now that the days are growing cooler.


These fun jugs by Heather Richards would look fantastic sitting on the dining table next to a warm apple pie and filled with custard. Comforting winter food alongside dreams of building sand castles in the summer would be bound to cheer any cold day.


I would love an entire dinner service like Kara Leigh Ford Ceramics rock pool plates. If you look closely, the glaze has a texture of water on sand.


This bunting has been illustrated by Lisa of The Illustrated World of Lisa Berkshire. It would look so good hanging in the kitchen, giving everyone a feeling of fun and adventure on the sea. Seeing this every day would definitely cause seaside envy. :)


Now that the nights are drawing in many of us are thinking of lovely projects to work on while staying indoors and keeping warm of an evening. Check out this pretty sea coloured yarn by Tracy of Little Things. It is a merino/nylon blend with a bit of gold stellina running through it and is called 'ocean'. *Love*


This bundle of threads by Sue of SusieandEmm has my mind swimming with ideas. The bundle contains a mix of fibres and thread types and would be great for sea themed embroidery or embellishing some crazy patchwork. Just look at all of the textures in this bundle!


This last item is marked as sold now, but I had to show you anyway. It is amazing! For all of you aspiring mermaids out there just look at this crown. Isn't it magnificent? It is the creation of Laura of LawR's Buttons and is the most perfect mermaid crown ever!


So many nice things! Did you see anything that floats your boat?

                                                         *B*

Tuesday, 27 September 2016

Tea Dishes and a Marvellous Afternoon Tea


Fabric Tea Tray

As I write this the sky is a hazy grey and people are walking around clutching their umbrellas. Dull weather but not a dull day. My view from the window is of the River Esk in Whitby where I'm spending a restful week after the fuss and exhaustion of a wedding party.

Green Fabric Tea Tray and Green China

I want to show you what I made using the tutorial for the little dishes mentioned in my last post. As I explained in that post my brother and his wife have had a second wedding reception in Britain as most of his family and friends couldn't attend the actual wedding which was held in Italy.

My brothers Italian wife wanted afternoon tea which is quite a novel dining experience for non-Britons, I've learned.

Afternoon Tea Table Setting

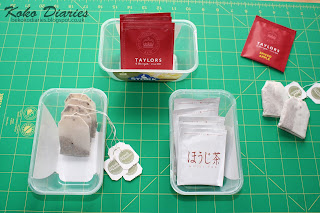
We had a selection of tea on each table for people to help themselves to so I made dishes to display them in. They needed to be a different size and shape than the square dishes I made to accommodate enough tea bags for all 8 guests at each table but the principle is the same.

Originally, my mum who was the party organiser, gave me some plastic tubs and asked me to cover them in fabric to be used as tea trays. But I thought sewing some trays would be much nicer so I decided used the tubs as a rough size guide instead.

Teabag Sachets

 I measured the tubs and compared their size to different brands of tea, I've never noticed how varied in size they are before. The sides of the tub are too high and the bottom needs to be a bit wider. So I quickly calculated/guessed at an alternative size and got cutting.

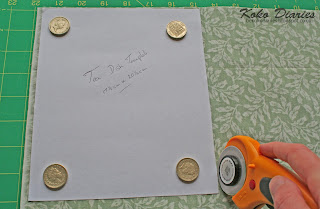
Pattern Weights

Prepared Fabric Cut with Trimmings

If you would like to make tea trays like mine the dimensions I used are 17.5 cm x 20.5 cm, the inner rectangle that forms the base is about 4cm in from the edges. I'm not going to write a tutorial here as these are made in exactly the same way as the original which I found on a Spoonful of Sugar

The fabric I used was given to me by my mum and is quite stiff but not heavy and I have no idea what it is. It's stiffness worked well with these trays though. I decided to use a polyester wadding this time instead of the fleece interfacing I used last time which may have been a mistake as the trays were a bit more floppy than I would have liked. To counter the floppiness I experimented with quilting them but I had a lot of trouble with the marker I was using. I used an air erasable pen to mark out circles to quilt but they disappeared too quickly so I went over the circles a few times with the pen which then took a long time to disappear and reappeared with real vigour upon being pressed with my iron. Argh.. This is the pen I use to make pattern markings when I sew bags and is clearly the wrong tool for quilting. I've never made a quilt (as you could guess) so all of this is new to me. If you are a quilter, what marking tools do you use?

In the end I found sewing a second row of topstitch about 5mm away from the first gave enough structure to the trays. All in all I was happy with them and they served their purpose very well. 

Afternoon Tea with Fabric Tray and Yellow Teapot
I love this yellow teapot
They looked very vintage and sweet sitting on the prepared tables in amongst the china, sandwiches and cake. Most importantly, my sister-in-law was very happy with the whole event and loved the afternoon tea. Mission accomplished.

                                                                         *B*

Wednesday, 7 September 2016

Little Dishes

Hello lovely peeps

Have any of you seen this sweet little dish tutorial from A Spoonful Of Sugar?
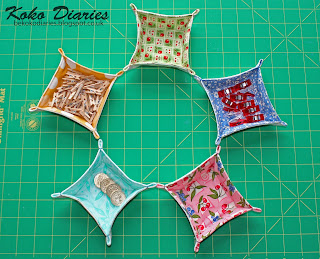
I've seen a few of these popping up around blogland so maybe you have.  I decided to make myself some and I have to say I can't imagine my sewing table without them now. I use them to hold my wonder clips, my pattern weights (yes, I use pound coins as pattern weights. Can you spy them?), my trimmings and threads and just about anything small that might roll away or get knocked about. Even my husband nicks them at times to use when he plays board games for all of the little pieces and 'meeples' (get me, I know some board game jargon).

here's mine

sewing notion dishes


charm square dishes


stacked dishes
look, stackable.


I love them. They are so easy to make and really useful. Double bonus.

I have another project to make using this tutorial. My brother recently got married in Italy which meant very few family and friends from Britain could attend so we are throwing another reception party for them over here. It's going to start with afternoon tea. I love afternoon tea. Sandwiches followed by cake then scones and cream then flapjack or other biscuits and lots and lots of tea. Bliss.

We'll need some little dishes for the tables.
Here's a sneak peak at my progress so far


green fabric rectangles

All cut out and ready to sew.

                                                                     *B*

Friday, 26 August 2016

For Pleats Sake! New Bag and a Review

A little while ago I realised I was in need of a new bag.


 Bags are my second favourite thing to sew (after soft sculptures and softies) and as a consequence I have quite a few. I have little ones for coins and cards, clutch purses for party items -cash and camera etc, I have medium sized bags for everyday essentials, but what I was missing was a large-ish bag for just stuffing things into.

Like when you go to the beach and need a towel and book and sun cream or when you're out shopping and the sales assistant asks if you need a bag for your lovely new outfit and you decline the offer as you delightedly think "pfft, not when I have a snazzy bag to tote around with me!"


I decided after looking through all of my bag pattern books that I needed a new pattern to try. Kinda like when you look through all of the dresses in your wardrobe and find you definitely need a new one for that party.

There is a pattern on U-Handbag that I found years ago when I was just starting out in bag making but I had never tried it. Now was my time, especially as it had an added bonus - it's a free pattern.


The For Pleats Sake Tote is quite a simple tote design. No pockets, no closures, zips or metal hardware. No frills. Quick. Easy. Great.

The pattern itself is just a rectangle for which measurements are given. No printing out or cutting around lots of pattern pieces. It came together quite quickly, partly because of the simplicity of the pattern but also because the instructions were so clear.


nice pleats

The pleats were very easy to create but I think a beginner bag maker may need to slow down and take their time to make sure they get the placement right; particularly on the thicker interfaced layer. The trickiest part was sewing the open 'V' at the side. You have the be very careful and precise about where you lower the needle to start sewing.


Open 'V' - the trickiest part of the pattern

I used a home dec weight fabric for the exterior and a cotton for the lining. I chose to sew simple webbing handles as I had some to hand but this bag would rock with nice leather handles with some metal rings. The fabric was given to me so I'm not sure what it is but the lining fabric feels like poplin. I'm happy to use poplin as bag lining as long as it's interfaced on larger bags. In this case the lining has a fusible fleece interfacing. Also any pockets would need to be reinforced to protect against wear and tear.

Speaking of pockets... this bag doesn't have any. There is nowhere to put a pocket because of the pleats but the pleats are necessary to give the bag nice body so... no pockets.


No pockets but space for crochet in the park *happy face*

Pros:
          Simple design, easy to make.

Cons:
          I miss having pockets for smaller items like purse and keys.

Conclusion:
         I love my new bag and I definitely have a hankering to make more.


                                                                      *B*


linking to Needle and Thread Thursdays